Menu
Menu

Let’s explore the eerie world of Halloween SVGs! From ghostly decorations to witchy costumes, let’s unlock how these versatile graphics transform our Halloween into something spectacularly unforgettable. Dive in with me, and together, let’s craft a Halloween filled with creativity and spooky charm using SVGs!
I still remember the first time I stumbled upon Halloween SVGs—what a game-changer for my crafting! These scalable vector graphics, ideal for intricate designs, revolutionized my Halloween decor and costumes. SVGs, or Scalable Vector Graphics, are perfect for holiday crafting because they maintain clarity at any size, essential for both small handouts and large banners.
Why are they perfect? Well, their precision and scalability allow endless creativity, whether I’m aiming to spook or delight. Plus, their compatibility with various cutting machines makes them incredibly versatile for all sorts of materials, from paper to fabric. Let’s delve into how Halloween SVGs can enhance your celebrations with their limitless creative potential.
My adventure with Halloween SVGs began with a simple window decal. A spooky witch silhouette was my first project. Initially, I struggled with the intricacies of SVG file handling, but soon, the crisp edges and detailed cuts revealed their potential.
Next, I tackled more complex party decorations. Remembering the thrill of seeing my creations come to life is still vivid. From eerie haunted house cutouts to playful pumpkin garlands, each project brought new challenges and learning opportunities.
However, not every project was smooth sailing. I recall one late night battling with a stubborn ghost SVG that just wouldn’t stick right. Through trial and error, I learned the importance of choosing the right adhesive and material compatibility.
These experiences, both frustrating and fulfilling, have deepened my appreciation for SVGs in crafting. They’ve transformed my approach to Halloween, turning simple ideas into festive reality that wows my friends and family every year.
Now, let’s explore how these versatile tools can elevate your Halloween to a realm of hauntingly beautiful possibilities. Together, we’ll delve into how SVGs can transform your holiday into something truly magical and memorable.
Let’s create a hauntingly beautiful haunted house silhouette, perfect for any Halloween decor. This step-by-step guide will help you master the art of SVG crafting, even if you’re just starting out.
Step 1: Select Your SVG File First, choose a detailed haunted house SVG. There are fantastic designs available that feature everything from creepy windows to ghostly outlines.
Step 2: Prepare Your Cutting Machine Load your black cardstock into the cutting machine. Ensure your blade is sharp for clean cuts. Set your machine to the “Cardstock” setting to avoid tearing.
Step 3: Cut Out the Design Initiate the cutting process. Monitor the machine to ensure it handles the intricate parts of the SVG without issues.
Step 4: Weed Your Cutout Carefully remove the excess cardstock, leaving only the haunted house design. Use a weeding tool to help with small pieces.
Step 5: Assemble Your Decor Apply adhesive to the back of your cutout. Position it on a contrasting background or directly onto your wall or window.
Step 6: Add Lighting (Optional) For an extra spooky effect, place LED lights behind the cutout. This will create shadows and enhance the haunted house silhouette at night.
Step 7: Display Your Masterpiece Choose a prominent place to display your creation. It makes a great centerpiece for your Halloween party or a welcoming decor piece by your entrance.
Crafting with Halloween SVGs can transform your holiday decor, and having the right tools and resources is essential. Here’s what I’ve found indispensable and where you can look to find high-quality SVGs for your projects.
Venturing beyond typical Halloween decorations, let’s explore how to use Halloween SVGs creatively. Imagine transforming these versatile designs into custom apparel, personalized trick-or-treat bags, and unique party favors. Here are some exciting projects to try this Halloween season.
Custom Apparel: Start by making your own spooky T-shirts. Use a glow-in-the-dark vinyl SVG of a skeleton or ghost to make your designs stand out at night. It’s perfect for both kids and adults attending Halloween events.
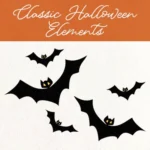
Personalized Trick-or-Treat Bags: Create custom trick-or-treat bags that kids can cherish year after year. Use SVGs to add each child’s name with a witch’s hat or bat design. These are not only cute but also help prevent mix-ups during busy trick-or-treating outings.
Halloween-Themed Face Masks: Given current health concerns, why not fashion Halloween-themed face masks? Decorate masks with SVGs like pumpkins or black cats to keep the festive spirit alive while staying safe.
Unique Party Favors: Use SVGs to design custom coasters or koozies as party favors for your Halloween gathering. Designs could include haunted houses, creepy trees, or fun Halloween puns.
Halloween Door Mats: Welcome guests with a DIY door mat stenciled with a Halloween SVG. Choose a friendly “Boo!” or “Trick or Treat” message to greet trick-or-treaters.
Thinking outside the traditional decor box with Halloween SVGs can make your festivities extraordinarily unique and personal. Get crafting and let these ideas inspire your Halloween creativity!
Ghosts, witches, and pumpkins are classics. I also love eerie forests and haunted houses.
Traditional orange and black, definitely. Also, try purple, green, and silver for a spooky vibe.
Absolutely! Customize bags with SVGs of bats or spiders. Add names for a personal touch.
Sure! How about ghost-shaped cookies or pumpkin cupcakes? Use SVGs for decorating stencils.
Dive into the mystical world of giants and fairies with a themed party that captures the imagination of all your guests! Here’s how you can use SVG files to create a magical “Giants’ Lair and Fairy Forest” theme for your next event.
1. Theme Overview: Envision a setting where gentle giants and elusive fairies coexist. The color palette mixes earthy tones for the giants (like deep greens and browns) with vibrant, ethereal colors for the fairy forest (like lavender, light green, and silver).
2. SVG Decorations: Create giant footprints and fairy wings SVGs to scatter around the party area. Use SVGs to cut out large leaves and vines to hang from the ceiling, simulating a forest canopy. Fairy lights can be intertwined with these elements for a magical glow.
3. Invitations: Design invitations that hint at the mystical nature of the event. Use SVGs for fairy silhouettes and giant tree designs, setting the tone for the theme.
4. Activities: Set up a fairy craft corner where guests can use SVGs to create their own fairy wings or magic wands. For a giants’ game, create large, footprint-shaped stepping stones with SVG cutouts for a fun, thematic obstacle course.
5. Costumes: Encourage guests to come dressed as either a fairy or a giant. Provide fairy and giant masks cut from SVG files at the entrance for those who come without costumes.
6. Party Favors: Send guests home with fairy jars (small jars filled with glitter and tiny LED lights) and giant’s treasure maps (aged paper SVGs with riddles and secrets to a pretend treasure).
7. Snacks: Serve “giant” snacks like oversized pretzels or cookies and “fairy” treats like mini cupcakes and fruit wands. Use SVGs to create custom food labels that match the party’s theme.
Reflecting on my crafting journey, Halloween SVGs have revolutionized holiday decorating. These versatile tools have enhanced my creativity, allowing for unique and personalized decorations each year. Experiment with these designs; you’ll find that they can transform ordinary materials into spectacular Halloween pieces.
I encourage you to embrace Halloween SVGs, play with new ideas, and perhaps innovate in ways you hadn’t imagined. Share your creations online and join communities of crafters who appreciate the magic of turning a simple SVG file into a piece of art. Together, let’s keep the spirit of creativity and sharing alive this Halloween season!
