

Discover the limitless potential of creating custom stickers and labels with SVG files and a Cricut machine. These tools merge creativity with practicality, transforming ordinary items into personalized masterpieces. Furthermore, they unlock a world where your designs come to life, offering a unique way to express yourself or brand your products. Additionally, this journey into custom creation is not only rewarding but also simple to embark on, thanks to the versatility of SVG files and the precision of Cricut machines. Start exploring how these projects can elevate your crafting or business endeavors.
Introduction: Custom Stickers and Labels with SVG
Dive into the creative world of crafting custom stickers and labels using SVG files, a method that combines flexibility with intricate detailing. SVG files are renowned for their adaptability across various projects, making them ideal for personalized designs. Coupled with the precision of Cricut machines, these digital designs can be transformed into tangible, custom pieces with ease. This powerful combination allows for the creation of both simple and complex designs, catering to all levels of crafting experience. Moreover, the process opens up endless possibilities for personalizing gifts, organizing spaces, or branding products, demonstrating the practical applications of these creative endeavors.
Exploring the Potential of SVG Files
SVG (Scalable Vector Graphics) files are pivotal in the crafting world, particularly for stickers and labels. Their vector-based nature ensures designs are scalable without losing clarity, perfect for both large banners and small decals. Furthermore, SVGs allow for intricate detailing, making them ideal for projects requiring precision. Additionally, their compatibility with various software and cutting machines, like the Cricut, simplifies the production process. This adaptability means SVG files can cater to a wide range of creative needs, from personal projects to professional branding efforts. Consequently, SVGs have become a preferred choice for crafters seeking detailed and versatile designs.
Getting Started with Your Cricut Machine
Embarking on your Cricut journey begins with understanding its basic setup and capabilities. Initially, familiarize yourself with its components, particularly focusing on the blade and mat selection, crucial for sticker and label projects. The fine-point blade is typically ideal for cutting intricate SVG designs on vinyl or paper. Additionally, choosing the correct mat—StandardGrip for most materials or LightGrip for delicate papers—ensures optimal results and material stability during cutting. Moreover, calibrating your machine for precision is key, especially for detailed designs. Lastly, experimenting with test cuts on scrap materials can save time and resources, providing insight into the perfect settings for your specific project. These initial steps lay a solid foundation for successful crafting with your Cricut machine.
Creating Custom Stickers with SVG Files
Begin by selecting your SVG design, ensuring it matches your project’s theme or purpose. Next, choose the appropriate material; vinyl is durable and waterproof, making it ideal for outdoor stickers, while paper offers a classic look for indoor use. Additionally, upload your SVG file to the Cricut Design Space, adjusting the size to fit your needs. Furthermore, set your Cricut machine to the correct material setting to ensure precise cuts. After cutting, weed away the excess material, revealing your design. Lastly, apply transfer tape to vinyl stickers for easy application. This step-by-step process simplifies creating custom stickers, turning your designs into professional-looking decals.
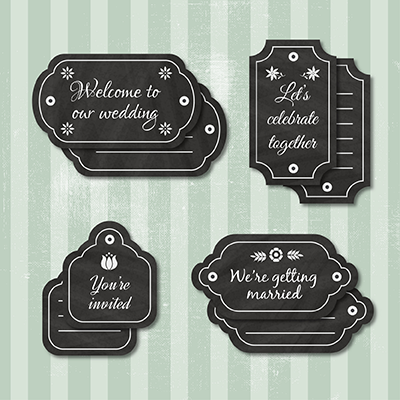
Crafting Labels with Precision
To create detailed labels, start by selecting a clear, readable font that complements the label’s purpose, whether for kitchen containers or office supplies. Additionally, incorporate simple yet appealing graphics or borders that enhance the label’s aesthetics without overwhelming the text. Furthermore, adjust your SVG design’s size to ensure it fits the intended surface perfectly, maintaining readability and visual balance. For materials, consider using permanent vinyl for durability, especially on items that might encounter moisture or frequent handling. Also, utilize your Cricut machine’s precision cutting feature to achieve clean edges and intricate details. Finally, apply your labels smoothly to avoid air bubbles, giving a professional finish to your organized spaces. This approach ensures your labels are not only functional but also contribute to the overall décor.
Tips for Perfect Application
Firstly, ensure the surface is clean and dry before application, removing any dirt or grease that might hinder adhesion. Next, use a squeegee or a credit card to apply the sticker or label from one side to the other, minimizing the risk of bubbles. Additionally, for vinyl stickers, consider using transfer tape to position your design accurately. Slowly peel back the tape at a 45-degree angle, ensuring the sticker remains on the surface. If air bubbles do appear, gently push them out towards the edges with a squeegee or a pin for smaller bubbles. Lastly, allow the sticker or label time to adhere properly, avoiding contact with water or handling for at least a few hours. These steps will help achieve a smooth, professional-looking application for your custom SVG stickers and labels.
Conclusion: Custom Stickers and Labels with SVG
Creating custom stickers and labels with SVG files and a Cricut machine blends creativity with practicality, offering endless possibilities for personalization. This process not only allows for the expression of unique ideas but also adds a professional touch to your projects. Moreover, the satisfaction of DIY personalization, from conceptualization to the final application, is immensely rewarding. So, dive into your own projects, exploring the vast potential of SVG designs, and experience the joy of bringing your custom creations to life.